

Frothy coffee at home looks like something only baristas can pull off. Yet more and more people are discovering that whole milk at 140-160 degrees Fahrenheit creates that velvety foam right in your own kitchen. Get ready to find out why the right foaming technique might be even more important than the fancy equipment you use.
Table of Contents
- Step 1: Gather Your Coffee Ingredients And Tools
- Step 2: Brew Your Coffee Using Preferred Method
- Step 3: Heat Milk To The Ideal Temperature
- Step 4: Froth The Milk Using A Frother Or Whisk
- Step 5: Combine Frothed Milk With Coffee
- Step 6: Taste And Adjust For Perfection
Quick Summary
| Key Point | Explanation |
|---|---|
| 1. Use Fresh Coffee Grounds | Fresh coffee grounds significantly enhance the flavor and aroma of your frothy coffee. Opt for medium to dark roasts for a rich, bold taste. |
| 2. Heat Milk to Optimal Temperature | Properly heating milk between 140-160°F ensures the right froth consistency, allowing milk proteins to create luxurious microfoam without scalding. |
| 3. Choose the Right Frothing Technique | Use either an electric frother for consistency or a manual whisk for hands-on experience to achieve smooth, velvety milk foam. |
| 4. Carefully Combine Coffee and Milk | Pour frothed milk into coffee at an angle for a beautiful layer, considering coffee-to-milk ratios for balance in flavor and texture. |
| 5. Taste and Adjust for Personal Preference | Tasting your coffee allows for adjustments in brew strength, milk temperature, and additional flavorings, tailoring the drink to your preference. |
Step 1: Gather your coffee ingredients and tools
Making frothy coffee at home starts with assembling the right ingredients and tools. Your journey to creating a perfect, creamy beverage begins here. While professional baristas make it look effortless, home coffee enthusiasts can achieve similar results with the right preparation.
First, you’ll want to collect your primary ingredients. Fresh coffee grounds are crucial for flavor intensity. Choose medium to dark roast varieties that provide rich, bold profiles perfect for creating frothy drinks. Instant coffee works well too, especially for techniques like Dalgona coffee. Next, select your milk carefully. Whole milk creates the most luxurious foam due to its higher fat content, but alternatives like oat or almond milk can also produce impressive results.
Equipment selection is equally important when preparing to make frothy coffee at home. A reliable milk frother transforms your coffee experience, whether electric or manual. Electric frothers provide consistent results with minimal effort, while manual options like handheld whisks offer a more hands-on approach. You’ll also need a sturdy mug, preferably with enough depth to accommodate your frothed milk and coffee.
Pro tip: Temperature matters significantly. Warm your milk between 140-160 degrees Fahrenheit for optimal frothing. Too cold, and the milk won’t create proper foam; too hot, and you risk scalding the milk and destroying its creamy texture. A kitchen thermometer can help you nail this critical step.
Lastly, consider your brewing method. Whether you prefer an espresso machine, French press, or pour-over technique, ensure your coffee brewing equipment is clean and ready. For those interested in exploring more advanced techniques, our guide on latte artistry offers additional insights into creating professional-quality coffee drinks at home.
By meticulously gathering your ingredients and tools, you’re setting the stage for a delightful homemade frothy coffee experience. Patience and preparation are your secret ingredients to coffee perfection.
Here is a helpful checklist table outlining each main step in making frothy coffee at home, with a summary goal and a reminder or pro tip for each stage.
| Step | Main Goal | Reminder or Pro Tip |
|---|---|---|
| Gather Ingredients & Tools | Assemble required ingredients and equipment | Use fresh coffee and whole milk for best results |
| Brew Coffee | Prepare a strong, flavorful coffee base | Let coffee cool slightly before adding frothed milk |
| Heat Milk | Reach optimal milk temperature for frothing | Heat to 140-160°F; avoid boiling or scalding |
| Froth Milk | Create smooth, velvety milk foam | Use circular motions and aim for tiny uniform bubbles |
| Combine Milk with Coffee | Blend frothed milk and coffee with gentle pouring | Pour at a 45° angle for even layering and presentation |
| Taste & Adjust | Refine final flavor, temperature, and texture | Take notes to improve and personalize every cup |

Step 2: Brew your coffee using preferred method
Brewing coffee is an art form that transforms simple ingredients into a rich, aromatic beverage. Your brewing method significantly impacts the final taste, texture, and quality of your frothy coffee creation. Each technique offers unique characteristics that can elevate your home coffee experience.
Pour-over brewing provides exceptional control and clarity of flavor. Carefully place a paper filter in your pour-over device, add medium-fine ground coffee, and slowly pour hot water in circular motions. Water temperature is crucial - aim for 195 to 205 degrees Fahrenheit to extract optimal flavor without bitterness. The slow, deliberate pouring allows water to interact evenly with coffee grounds, creating a clean and nuanced brew perfect for frothy beverages.
For those seeking convenience, French press brewing offers a robust alternative. Add coarsely ground coffee to the press, pour hot water, and let it steep for approximately four minutes. The metal mesh filter allows natural oils to pass through, creating a richer, more full-bodied coffee that stands up beautifully to frothed milk. Gently press the plunger down, separating grounds from liquid, and you’ll have a deep, flavorful base for your frothy coffee.
If you’re interested in exploring more advanced coffee techniques, our guide to crafting perfect latte art can help you take your brewing skills to the next level. Whichever method you choose, remember that consistency is key. Use the same measurements, water temperature, and brewing time to ensure repeatable results.
Once brewed, let your coffee cool slightly to prevent scalding when adding frothed milk. A perfectly brewed coffee should have a rich aroma, clear color, and no grounds or sediment. The ideal brew will provide a strong foundation for your upcoming frothy coffee adventure, setting the stage for a delightful and creamy final beverage.
Below is a summary table of common at-home coffee brewing methods, with their key characteristics and how they influence your frothy coffee experience.
| Brewing Method | Coffee Grind Needed | Flavor Profile | Frothy Coffee Suitability |
|---|---|---|---|
| Pour-over | Medium-fine | Clear, nuanced, clean | Excellent for layered drinks |
| French press | Coarse | Robust, full-bodied | Great for rich combinations |
| Espresso machine | Fine | Bold, concentrated | Ideal for cappuccinos/lattes |
| Instant coffee | Powdered | Quick, mild, versatile | Good for Dalgona or basics |
| Drip coffee maker | Medium | Balanced, mellow | Works well for mild drinks |
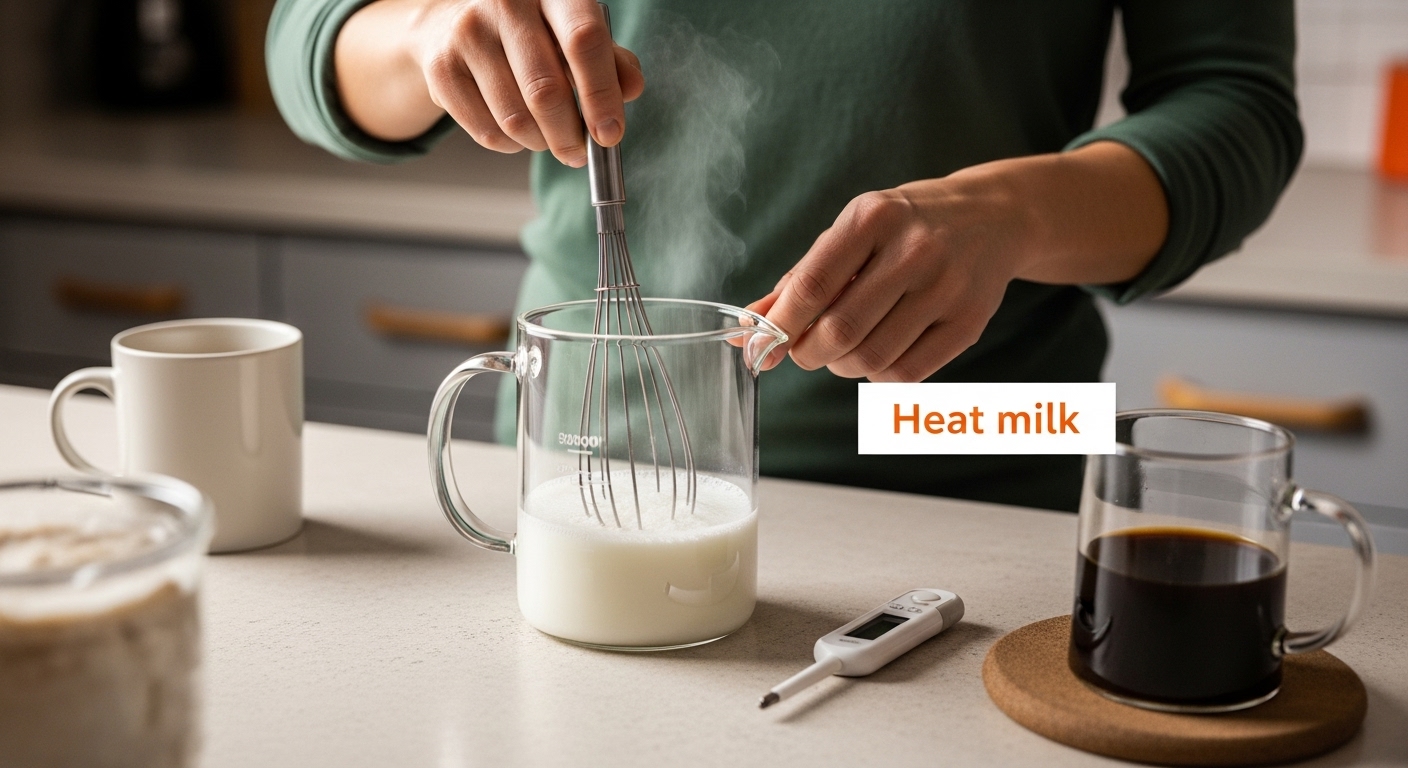
Step 3: Heat milk to the ideal temperature
Heating milk to the perfect temperature is a critical step in creating luxurious, frothy coffee. The science behind milk frothing revolves around precise temperature control that transforms ordinary milk into a creamy, velvety texture. Too cold, and your milk won’t develop the right foam; too hot, and you’ll destroy its delicate structure.
Whole milk works best for frothing, providing a rich, smooth foundation. Start by pouring your milk into a clean, dry container. If using a thermometer, aim for the sweet spot between 140 and 155 degrees Fahrenheit. This temperature range allows milk proteins to expand and create that desirable microfoam without scalding. Home baristas can achieve this using several methods. A dedicated milk steamer provides the most consistent results, automatically heating and aerating milk to perfection.
For those without specialized equipment, a stovetop or microwave can work effectively with careful attention. When using a stovetop, use low to medium heat and stir constantly to distribute temperature evenly. Watch for subtle steam and small bubbles forming around the edges of your milk - this indicates you’re approaching the ideal temperature. Stop heating just before the milk begins to boil, as boiling destroys the milk’s ability to create smooth, silky foam. If using a microwave, heat in short 15-second intervals, stirring between each to prevent hot spots.
Our guide to crafting sweet coffee variations offers additional tips for milk preparation. A digital thermometer provides the most accurate way to check milk temperature, but experienced baristas can also use the touch method. Dip your finger briefly into the milk - it should feel hot but not burning, similar to a comfortable bath water temperature.
Successful milk heating is characterized by a glossy, paint-like consistency. The milk should look smooth and have a slight shimmer, without large bubbles or a skin forming on top. These visual and textural cues indicate you’ve reached the perfect temperature for creating a sublime, frothy coffee experience.
Step 4: Froth the milk using a frother or whisk
Frothing milk transforms an ordinary coffee into a luxurious, creamy beverage. This step requires precision, patience, and the right technique to create that perfect microfoam which gives specialty coffee drinks their signature texture. Whether you’re using an electric frother or a manual whisk, the goal remains the same: incorporate air into the milk to create smooth, velvety foam.
Electric milk frothers provide consistent results with minimal effort. Position your preheated milk in the frother, ensuring you do not fill beyond the maximum fill line. Most electric frothers have multiple settings - choose a medium speed to create fine, consistent bubbles. Tilt the container slightly to create a gentle whirlpool effect, which helps distribute air evenly throughout the milk. Whole milk produces the most luxurious foam due to its higher fat content, though alternative milks can also work with practice.
For home baristas without an electric frother, a manual whisk offers an excellent alternative. Begin by holding your whisk at a 45-degree angle, creating a rapid circular motion just beneath the milk’s surface. This technique introduces air and creates those desirable tiny bubbles. Move the whisk up and down while maintaining circular motion, which helps incorporate air more effectively. Explore our range of handheld milk frothers for a professional touch in your home coffee preparation.
The perfect froth has a glossy, paint-like consistency with tiny, uniform bubbles. You’ll know you’ve achieved the right texture when the milk looks smooth and has a slight sheen, without large, distinct bubbles. The foam should be thick enough to hold its shape when spooned, but soft enough to blend seamlessly with your coffee. Practice and patience are key - each attempt will bring you closer to creating that coffeehouse-quality frothy beverage right in your own kitchen.
Step 5: Combine frothed milk with coffee
The moment of truth arrives when you combine your perfectly brewed coffee with luxuriously frothed milk. This final step transforms individual ingredients into a harmonious, creamy beverage that delights both the palate and the senses. The technique of adding milk to coffee is an art form that requires gentle precision and understanding of how flavors and textures interact.
Pouring technique matters significantly in creating a visually appealing and deliciously balanced drink. Begin by holding your coffee mug at a slight angle, approximately 45 degrees. Slowly pour the frothed milk from a moderate height, allowing the foam to cascade gently into the coffee. Start by pouring from the edge of the mug, then gradually move toward the center. This method helps create a beautiful layering effect and ensures the milk integrates smoothly with the coffee without disrupting its temperature or breaking down the delicate foam.
For those seeking to elevate their home coffee experience, consider the coffee to milk ratio. A classic cappuccino typically follows a one-third rule - one-third espresso, one-third steamed milk, and one-third milk foam. Latte lovers might prefer a more milk-heavy composition, while those who enjoy a stronger coffee flavor can adjust accordingly. Explore creative beverage variations to expand your coffee preparation repertoire and discover new flavor combinations.
The final test of a perfectly combined coffee is in its appearance and taste. Your beverage should have a rich, uniform color with a smooth, creamy surface. The milk foam should sit delicately on top, creating a luxurious texture that invites you to take that first delightful sip. When done correctly, you’ll have transformed simple ingredients into a professional-quality coffee drink that rivals any cafe offering.
Step 6: Taste and adjust for perfection
The final and most crucial step in creating the perfect frothy coffee is tasting and making nuanced adjustments. This moment transforms your technical preparation into a personalized sensory experience. Professional baristas understand that every cup is unique, requiring careful evaluation and subtle refinements to achieve coffee excellence.
Begin by taking a deliberate, mindful first sip. Notice the balance between coffee intensity and milk smoothness. Temperature plays a critical role - the ideal drinking temperature ranges between 130 and 160 degrees Fahrenheit. If the beverage feels too hot, allow it to cool slightly. If it’s too cool, you might need to adjust your initial milk heating or brewing temperature. Pay attention to the foam’s texture - it should feel light and creamy, not dense or bubbly.
Flavor balance is paramount. A well-crafted frothy coffee should have harmonious notes where neither coffee nor milk overwhelms the other. If the coffee tastes too bitter, consider adjusting your brewing time or using a slightly coarser grind. For those seeking additional depth, a pinch of cinnamon or a drop of vanilla can elevate the entire drinking experience. Some coffee enthusiasts experiment with alternative milks or sweeteners to personalize their perfect cup.
Remember that consistent practice leads to mastery. Each brewing session provides an opportunity to refine your technique. Take mental notes about what works and what could be improved. Small adjustments in milk temperature, frothing technique, or coffee-to-milk ratio can dramatically transform your beverage. Keep a coffee journal to track your experiments and gradually develop your signature frothy coffee method.
Achieve Frothy Coffee Perfection at Home with Unicoff
If you are ready to elevate your at-home coffee experience but struggle to create creamy, café-style froth, you are not alone. The article highlighted how crucial the right tools, temperature, and milk technique are for professional results. Without a reliable milk frother, even the most carefully brewed coffee can lack the velvety topping that transforms an ordinary cup into a delightful treat.
Stop settling for less. Unlock the secret to luxurious frothy drinks by choosing a top-rated milk frother from Best Milk Frother for Your Home | Shop Now. Hundreds of coffee lovers trust Unicoff for high-quality gadgets, quick shipping, and outstanding customer reviews. Ready for your upgrade? Visit Unicoff.com to discover exclusive deals and get closer to coffeehouse results right at your kitchen counter. Your perfect froth is only a click away—make it happen today.
Frequently Asked Questions
What is the best milk to use for frothy coffee?
Whole milk is generally the best choice for frothing due to its higher fat content, which creates a richer, creamier foam. However, alternatives like oat or almond milk can also produce good results, depending on your preference.
How do I heat milk for frothing without scalding it?
To heat milk without scalding, aim for a temperature between 140 and 155 degrees Fahrenheit. Use low to medium heat while stirring constantly, or heat in short intervals in the microwave, checking the temperature frequently.
Can I froth milk without a frother?
Yes, you can froth milk using a manual whisk. Hold the whisk at a 45-degree angle and whisk rapidly in a circular motion, incorporating air until the milk develops a smooth, foamy texture.
How do I achieve the perfect coffee-to-milk ratio?
For a classic cappuccino, use a one-third rule: one-third espresso, one-third steamed milk, and one-third milk foam. Adjust the ratio according to your taste—more milk for a latte, or less for a stronger coffee flavor.